Getting know presets
You can work with presets in two places in the user interface. You can edit presets in the edit presets dialog. Or you can apply presets directly to the selected files in the main window's toolbar Presets button.
Presets dialog
Presets dialog is the main place to edit presets. You can open it from the main menu View -> Presets (Cmd+1), or with Edit Presets… in the
main window's toolbar Presets button. A popup dialog
appears. The dialog is divided to two areas.
In the left area, you create, manipulate, remove, import/export presets as whole. On the right side, you edit content of the selected preset.
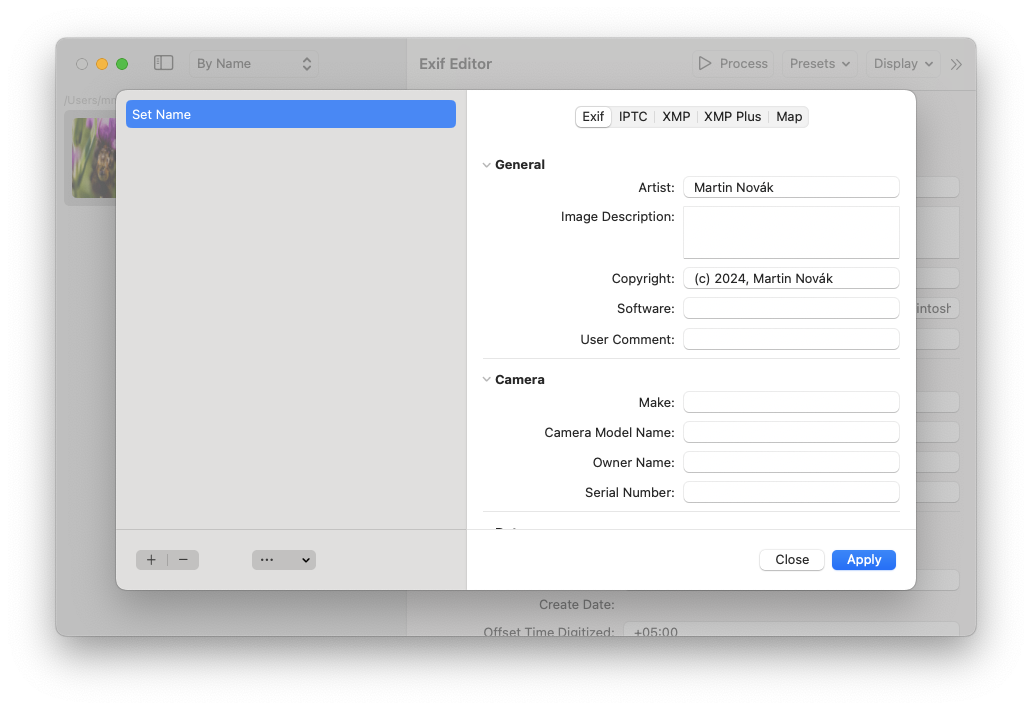
Commands
Below the presets list on the left, there are commands that work with presets as a whole. They are:
- Add Preset
- Remove Preset
- In the menu
- Rename Preset
- Remove All Presets
- Import
- Export Selected
- Export All Presets
On the bottom of the right side, there are buttons for closing the dialog, and for applying the selected preset to the currently selected files. Note that the Apply button is shown only when there is some file selected. Applying a preset changes the tags of the selected files and closes the dialog. As with any other edit, the files are changed on disk only after you save them.
Also notice that closing the dialog automatically saves the presets.
Presets are saved in the user defaults.
Note that the Remove Preset (-) button removes the selected preset immediately, without asking.
Basic Preset Operations
Creating presets
To create preset, press the + button below the presets list. A new preset appears and is selected.
Renaming the presets
You can rename preset by double-clicking on the name of the preset in the presets list.
After changing the name, confirm by the Enter key.
Exporting/Importing presets
Exporting and importing presets is a great way how to transfer presets from one computer to another. Just export the preset(s) by clicking on the Export Selected/Export All items in the menu below the presets list.
Exif Editor exports presets into a file with the .exifpreset extension. Its content is simple JSON, so if you want to
process it yourself in other software, you won't have problems. Opening an .exifpreset file in Exif Editor imports
the presets.
Applying presets in the main window
You can apply the presets from the main window's toolbar. Click the Presets button and choose a preset from the menu. The preset is applied to all currently selected images.
Applying a preset changes the tags only in Exif Editor. Save the files to write the changes to disk.